Thursday 15 November 2012

Simple Trick To Use Bold and Underlined Text in Facebook Chat

All the people are using facebook and sending a message to his friends.but this facebook message has some hidden trick.this tricks are very interesting and very funny.

Now follow the steps to send bold and underlined text in facebook chat.
1.go to facebook.com and login
2.then select any people to chat
3.for bold type any word with *(star).
example: hy *friends* then it displayed in hy friends
4. for underlined text just type any word with _(underscore)
example: hy _friends_ then it displayed in hy friends
thats all use this trick and share to your friends.if any problem then comment here

View Stored Password in Mozilla Firefox

Mozilla firefox is the best browser and it consists more features then flexible to users.Many browser's are protect the saved passwords and difficult to view it.
but the firefox provide a new option. That is view the stored password. This option are helps to users when the password are forgot. But this same way are used to stolen the password from others.

Method 1:

Step1:
go to Tools –> options and then click security tab.
step2:
Click on the Saved Password button then it can be opened in new window.
step3:
Click on the show passwords button.
now it will be ask to you a small alert for view this password just press yes.
step4:
now select the wanted website to view the password.

Method 2:

*go to the any login page like facebook,gmail
*right-click anywhere on the page.
*Select View Page Info and then the Security tab.
*Click View Saved Passwords. Another window will pop up showing the usernames associated with that site.
*Click Show Passwords to see the passwords for each username.

Wednesday 14 November 2012

Open/Unblock YouTube in Pakistan

These three methods to open any blocked website like YouTube in Pakistan are for different users according to their usage.

1. Normal Users;
This method is for all those who just want to watch videos on YouTube and want to unblock YouTube only for watching videos. All those people are requested to open any of the following websites.
www.proxfree.com OR
www.kproxy.com

Inside the box just write down YouTube.Com and press Enter button, YouTube will be open and you can browse/download videos from YouTube on your normal speed. In these methods you cannot login to your YouTube Account.

2. YouTube Video Downloaders;
This method is for all those who want a maximum speed of download for YouTube videos, they are requested to open the following website.
www.hotspotshield.com and download the software (free) after installing the hotspotshield enable the software and browse for YouTube videos.
In this method you will be able to login to your YouTube account and can watch YouTube videos without any problem of speed. You will get the maximum speed for download that you have. In this method you cannot upload videos to your YouTube account.

3. YouTube Video Uploaders;
This method is for all those who want to upload videos to their YouTube account. Simply logon to www.spotflux.com and download the spotflux. After installing enable the software and start uploading videos to your YouTube account. Please do not download videos using this method because it reduces the speed upto 3 times than your original one, but so far the best way to use for uploading videos to YouTube Account where YouTube is blocked.

IMPORTANT: Someone has commented that his/her connection was terminated by PTCL, I am using these proxies for last two years since YouTube and Facebook was firstly blocked in Pakistan by PTA.
For more updates please subscribe to my Blog or Join my Facebook Page.

Thursday 8 November 2012

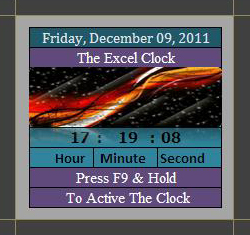
Create a Digital Clock On Excel.

You can create a clock in Excel 2003,2007,2010 in one or any cells using following formula

=TEXT(HOUR(NOW()),"00")&":"&TEXT(MINUTE(NOW()),"00")&":"&TEXT(SECOND(NOW()),"00")
And for the  Day, Month & Year you can uses the excel NOW function:
Formatting Process
=Now()
Picture
The Format the cell according to you need
Ctrl+F1 => Number => Date => Select format.

Tuesday 6 November 2012

Locking & Unlocking Modem

Unlocking & Locking Modem
 
The following shows the two states of ModemLockDown within your Windows taskbar - Locked & Unlocked:
Unlocking

To unlock the modems and allow an internet use:
1. Click the ModemLockDown taskbar icon and then choose the Unlock Modems option.
The Unlock screen appears.
2. Enter the correct Unlock Password. The Unlock Modems buttons will remain inactive until the correct Unlock Password is entered.
Once enabled choose either the "Unlock Modems - No time restriction" or the "Unlock Modems - With time restriction" button. If the time restriction option is chosen, you must then select an unlock period. See below.
The taskbar icon changes to green, the modems are unlocked and an internet use can resume.

Internet Access with Time Restriction

You may provided limited and automated internet access without using the "Scheduled User Access" option.
To grant access for a certain time, select either the 'Unlock Modems - With time restriction' option when unlocking the modems (described above) or select the 'Change Unlock Period' during an existing access period.
You will be presented with the following screen where you can choose the access time period required. The user will recieve notification close to and at the time the internet will be disabled.

Locking

To lock the modems immediately and cease internet access:
Click the ModemLockDown taskbar icon followed by the Lock Modems option.
That's it! The modems are now locked, any existing connection has been dropped & no new connections can be made until an unlock is in effect.
NOTE: If the "Use User Schedules" locking option has been chosen, it is not possible to lock the modems while a scheduled Unlock is in effect. See Locking Options for more information about this.

Use USB Flash As Ram In Pc

You might have noticed that your computer (window vista and xp) runs so slow while working on it, this might be as a result of low Ram space or large programs being utilized.
Today you're on the path to learn how you can use your Flash Drive as a Ram to boost up the speed of your Pc.
Many don't know the software with the name "eBoostr" while few know about it but not knowing what it's used for. eBoostr is a computer software that allows you use your USB Flash Drive as a Ram.
To learn how you can turn your USB Flash Drive into a Ram just follow the steps below :

Using USB Flash As Ram

1. You have to download the eBoostr Software which comes as zip, Unzip and Install it. The Software being a Trial Version only allows you to use it for about 5 Hours at a go. Like wise the purchased version the trial version never expires but denies you the option of using it as long as you wish like the purchased version.
So if the trial version stops working after 5 Hours, all you have to do is just restart your Pc and start using it.
You can download the free Trial version of "eBoostr."

2. After Installation Reboot your computer when ask to, Don't Ignore the Notification.

3. After your PC is been Restarted, Insert your USB Flash Drive then Open the eBoostr Software that you earlier Installed on your PC.

4. In the Program eBoostr window, Go to Edit -> Add New Cache Device, select your USB disk at the left screen and click Ok. And it will start caching the memory in your USB drive.

Monday 5 November 2012

USE KEYBOARD WITH MOUSE (ON SCREEN KEYBOARD)

Use Keyboard with mouse
If you feel that your external keyboard is not working properly or some particular key is not functioning then you can use internal keyboard on your desktop screen. This property of keyboard is found in windows xp and seven. Just follow these steps
Go to start menu and press “run
Type  “osk
Now press enter.
(note. Don’t use commas)
you will see keyboard on your desktop screen. Now use mouse to click on keys for operation.

Convert Image to Icon with Any to Icon Converter

image to icon converterAny to Icon 3.51 converts BMP, JPEG, GIF, PNG, PCX, PSD, TGA, TIFF, WMF, WBMP, XPM, XBM and CUR formats into Windows icons. You can add files and folders from Windows Explorer or other file shells using drag and drop. You also can paste bitmaps from the clipboard and change color resolution and size to create customized icons. It's possible to convert 256-color icons into True Color icons and vice versa.

In addition, you can split icon libraries into individual icons. Any to Icon allows you to extract icons from folders and libraries and place them into the directory of your choice.

The application has wizard and command line interfaces that make it simple to process multiple files at once. You can find many images on the Internet and convert them to icons for use on your Windows desktop, in applications and elsewhere.

Supported formats:
  • ICO - Windows Icon
  • CUR - Windows Cursor
  • BMP - Windows Bitmap
  • GIF - Compuserve Graphics Interchange Format
  • JPG - JPEG JFIF Image
  • PNG - Portable Network Graphics
  • PCX - ZSoft Publisher’s Paintbrush Image
  • PSD - Adobe Photoshop Image
  • TGA - Truevision Targa Image
  • TIF - TIFF Image
  • WMF - Windows Metafile
  • EMF - Enhanced Windows Metafile
  • WBMP - Wireless Bitmap
  • XBM - X Bitmap
  • XPM - X Pixmap
  • ICL, EXE, DLL, SCR, IL, NIL and other icon libraries
System requirements:
 Windows 95/98/ME/2000/NT/XP/2003/Vista/7/8, 32 MB RAM, Pentium-233 MHz, 15 MB Hard Disk.

Trial limitations: Nag-screen, only 5 files can be converted only at once, 30 trial runs allowed.

Sunday 4 November 2012

Convert a PDF File to Word, Excel or JPG Format

One common question I’ve run across a lot these days in the office is how to convert a PDF file to Microsoft Word format (doc), Excel format (xls), or JPG picture format. Usually, people want to know how to convert a file to PDF, but it’s also nice to be able to convert back the other way. Converting to Word is actually pretty simple and can be done directly using an online file conversion service called Zamzar. Going to Excel or JPG is a two step process, but nothing very difficult to follow.
Update: There’s a much easier way to convert a PDF to JPG image format than the method I have mentioned below. Here’s how you can do it using Zamzar.com.

Convert a PDF file to JPG – Easy Way

Go to ZamZar.com, browse for your file and choose PNG format for the format to conver to under Step 2. PNG is another newer picture format that is slowly replacing the JPG format. Most programs that can open JPG files can open PNG. Zamzar automatically converts each page in the PDF document into it’s own PNG picture file. Now you can simply open Microsoft Paint (yes, all you need it Paint!) and choose File – Save As from the menu and choose JPEG from the drop down list of formats.

microsoft paint

Convert PDF to JPG Format – Second Way

The first thing you’ll need to do is download a free software (the only one I could find) that converts PDF documents to JPEG image format automatically. Go to the Omniformat download page and download both Omniformat v8.3 and the PDF995 app. You will need to download and install PDF995 first before installing Omniformat. Once you have both programs installed, go to your Start Menu programs, find the program group Software995 and click on Omniformat.


software995.jpg

The only annoying thing about this program is that it requires you to view some ads for about 30 seconds! However, it’s better than paying $20 or $40 for a program just to do a simple conversion! It does pop up another instance of your browser window for the web site of each of the sponsors, but it does not install any spyware onto your computer (no popup ads). Once the program is loaded, you’ll see it has a section called “Watch Folders” and then a button at the bottom titled “Start Monitoring” and “Single Pass“.

pdf-to-jpg.jpg

Basically the way it works is that you need to COPY the PDF files you want to convert to JPG format to the C:\omniformat\watch folder and then press Single Pass. The program will look in that directory and convert each page of each PDF into a separate JPG file. If you click Start Monitoring, you can keep dropping PDFs into that folder and the program will automatically convert them into JPGs as long as the program is open. Note that the program DELETES the original PDF document that it uses, so that’s why you need to COPY the PDF document to the watch folder, not move it! You should now see your converted files like below:

pdf-to-jpg-convert.jpg

Convert your PDF to a Word document

Go to Zamzar.com and click the Browse button next to Step 1 and choose your file. By default, Step 2 will be set to DOC format, but you can choose to convert your PDF to other file types such as TXT, HMTL, RTF, etc. Type in your email address for Step 3 and click Convert.
file conversion
You should receive an email within a few minutes with a download link to your converted file. I have tried out this service on some pretty complex PDF documents with text in multiple columns, multiple images, etc and have been very impressed with it’s conversion accuracy.

Convert a PDF file to Excel format

We will again follow the steps above using Zamzar, but this time choose TXT as the format you want to convert to. Unfortunately, you can’t convert straight to Excel format, so we’ll have to go through the intermediary TXT format. Once you have downloaded the TXT file and saved it on your computer, open Microsoft Excel and go to File – Open and change the Files of Type combo box to All Files.

convert pdf to excel

Now you should see the converted text file in the list of files. Choose it and click Open. You’ll now be brought to the Text Import Wizard. You have to open the file in this manner because if you simply right-click and say Open With Excel, all of the text for each row will appear in the first column and not be separated.
For Step 1, choose Delimited from the two options listed.

convert pdf to word

Click Next and check off the Space checkbox as one of the delimiters. Each value should now be separated by a vertical line, indicating it’s going to be in a separate column.

convert pdf to jpg

Click Next and then click Finish. You can now save the file as an Excel file by going to File – Save As. There are a few drawbacks, however, as this conversion does not always work perfectly! For example, if the original Excel sheet had a column where there was text with spaces included, each word will be separated into it’s own column! Also, you won’t see any formulas or functions that may have been in the original Excel sheet, only the text.
It’s as easy as that! You can use many other image editing programs also such as Photoshop, Corel, etc, etc, but I chose Paint because that is universally available on just about every Windows computer.
Saturday 3 November 2012

Make Your Own Movies on Your Computer

Make Your Own Movies on Your ComputerMake your own home movies that you can store and edit on your computer, convert to CD Rom, e-mail.
  1. Obtain a webcam. You don't need to have one of those fancy little white round ones. You can get a cheap one from Wal-Mart


  2. Choose Video Editing Software - Windows Movie Maker is available in Windows but if you are using a Mac try iMovie or Linux try AviDemux.
  3.  Check how to operate your webcam. Attach your camera to your computer via USB cord, normally included with camera. Make sure your camera is in WebCam mode. Find out how to put it in WebCam mode in your manual.
  4. Click Tasks in Windows Movie Maker.
  5. Click Capture video.
  6. Enter specific settings in the window that appear. You need to enter a title for the scene. Select Best Quality for Playback on my computer and then click Next. Now, position the camera correctly so that you can capture yourself.
  7. Click Start Capture to begin recording, and then click Stop Capture to stop recording.
  8. Click Finish.
  9. Start arranging movie clips. Drag your clips to the time-line/storyboard at the bottom of the page.
  10. Click View video effects. You can add effects to your video clips, such as increasing the brightness, easing in on the picture, and more!
  11. Add titles at the beginning, end credits and transitions. This step is optional.
  12. Burn your movies to a CD using third-party software or a pre-installed CD burner in your XP. You can also e-mail your movies to your friends!